Introduction
When editing photos in Lightroom Classic, one common problem is the introduction of unsightly artifacts that appear along the edges of objects, often at the edges of light and dark areas. This is a result of making strong adjustments, often with masks – and these artifacts can be difficult to remove, especially for people new to Lightroom, or any post processing software.
Whether you’re using linear gradients, radial filters, AI masking, or luminosity-based selections, pushing exposure and/or contrast too far can leave behind unnatural edges, halos, or patchy transitions. These artifacts can be subtle, but they instantly draw the eye and ruin the realism of the image.
This is especially true when masked adjustments overlap with detailed edges – like hair against a bright background, or in landscape photography, tree branches against the sky. Even with careful masking, those fine transitions between masked and unmasked areas can break down, leaving behind harsh outlines or tonal mismatches.
In this blog post, I’m walking through a real-world Lightroom Classic example where this problem shows up clearly – and more importantly, how to fix it.
I’ll show you how to:
- Darken a bright sky using a linear gradient
- Preserve delicate detail in dark tree branches by intersecting it with a luminance mask
- And most critically, how to adjust the luminance range settings to eliminate harsh edge artifacts – so the final result looks natural and seamless. It’s a delicate balancing act between the application of the mask itself, and the exposure adjustment changes that you want to make.
The screenshots below show both the problem and the solution, side-by-side — so you can see exactly how the right settings remove those unwanted effects without compromising the mood or balance of the image.


About this Post
This blog post is adapted from a short section of a 50-minute YouTube video (linked below) that walks through the full post-processing of an image in Lightroom Classic. The full video shows how to create a faded, atmospheric and cinematic look that enhances the original composition.
This section focuses on how to reduce and/or remove nasty and persistent artifacts after making certain adjustments
How to Darken the Sky Without Losing Natural Detail in the Trees
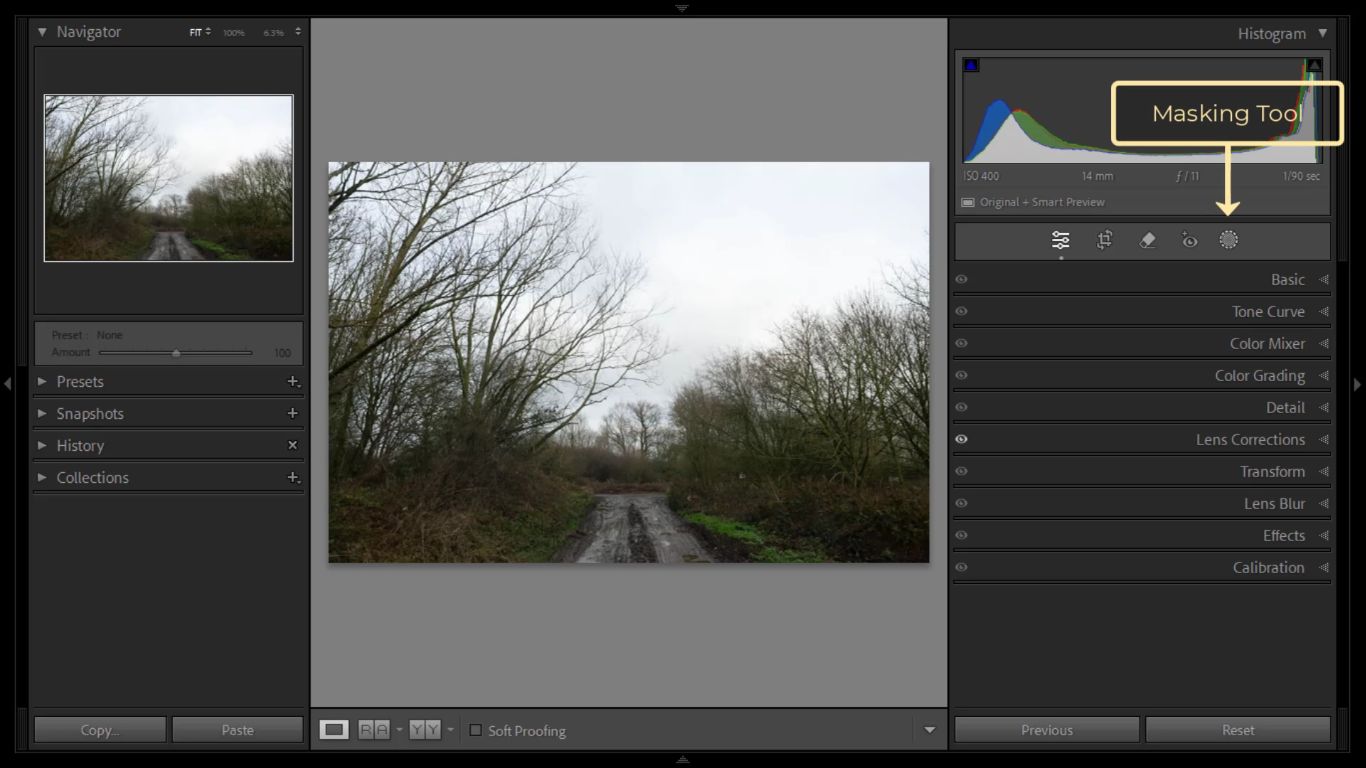
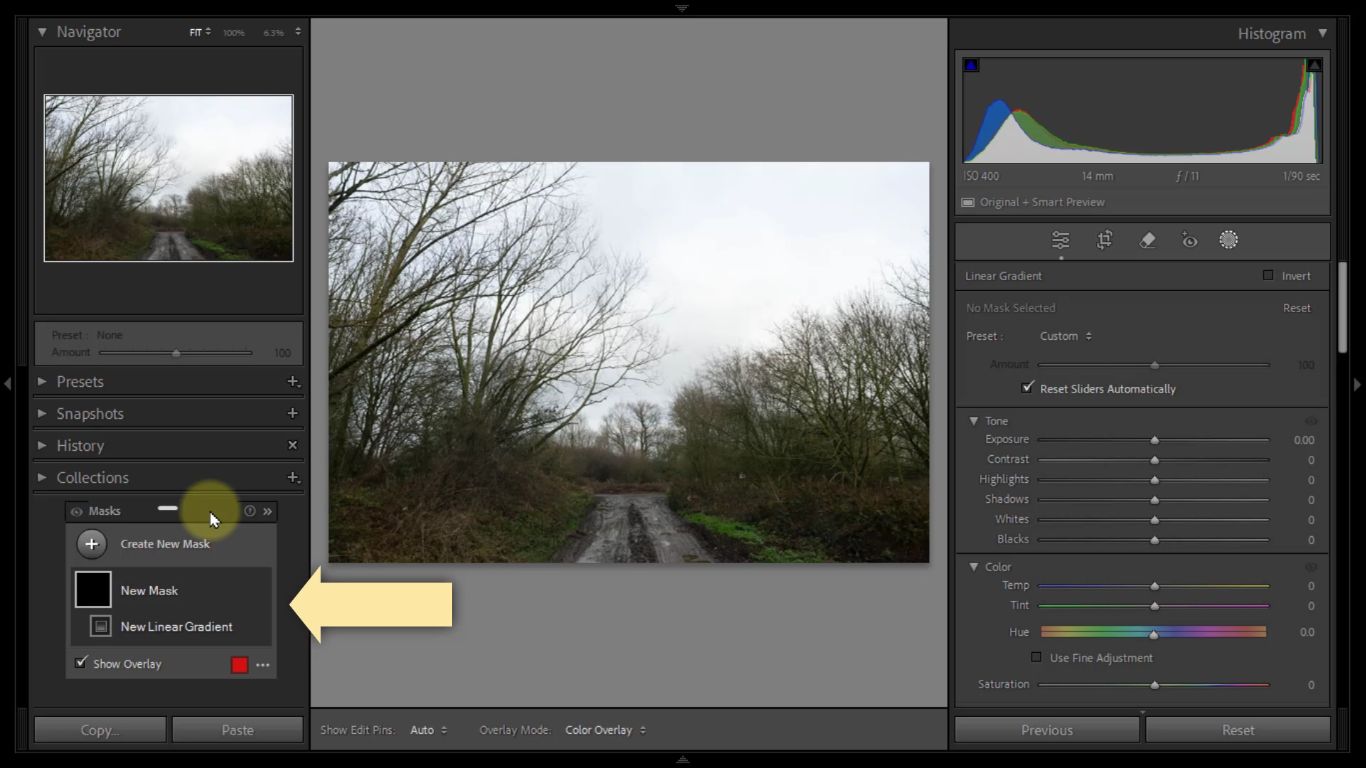
Step 1: Open the Masking Panel
So I head to the masking panel by clicking the circular icon at the end of the five icons.
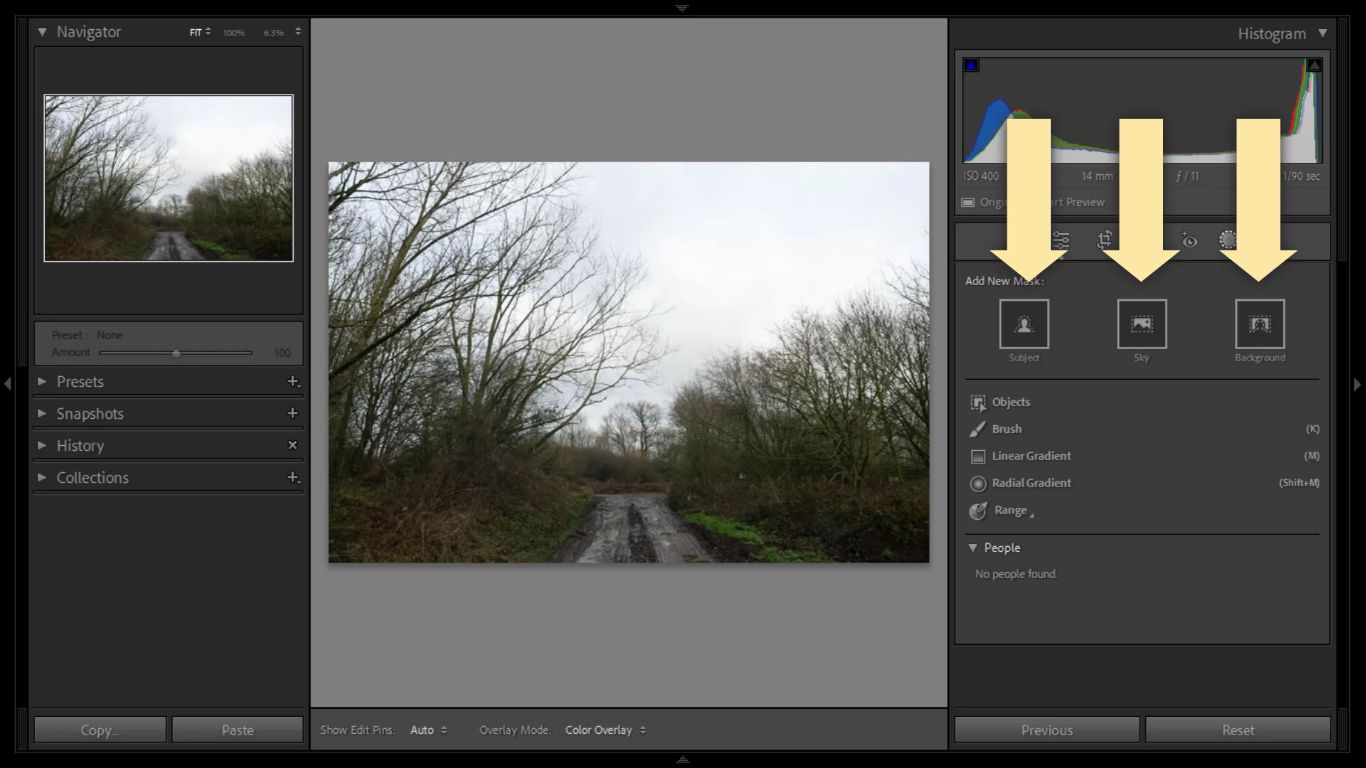
Inside the panel, you’ll see three AI-powered mask options (Subject, Sky, Background), but in this case, I skip the AI because:
- It tends to misinterpret the small tree branches against a bright sky.
- It requires too much correction that cannot easily be made to the AI selection..
- A manual gradient is quicker and ultimately more precise.
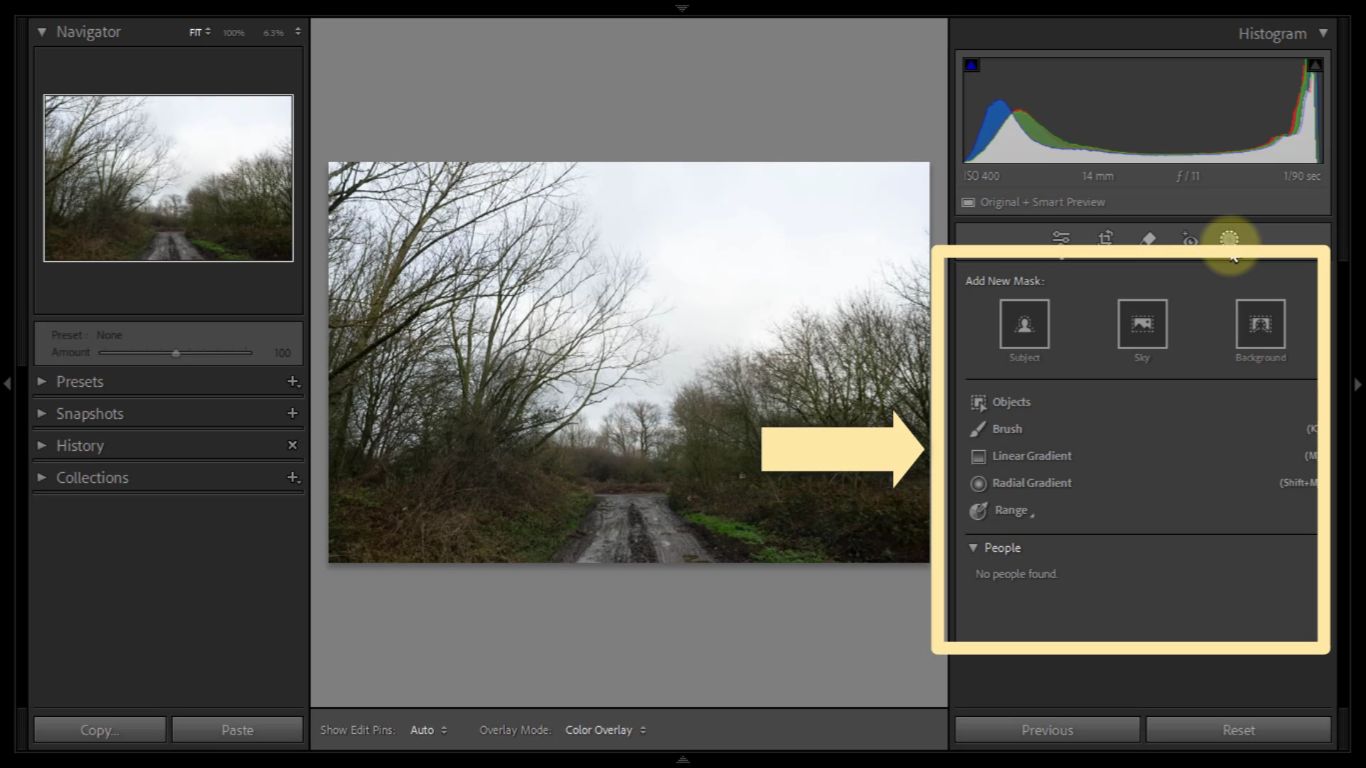
Step 2: Apply a Linear Gradient to the Sky
- I select the Linear Gradient option.
- A new mask appears in the panel with the linear gradient applied.
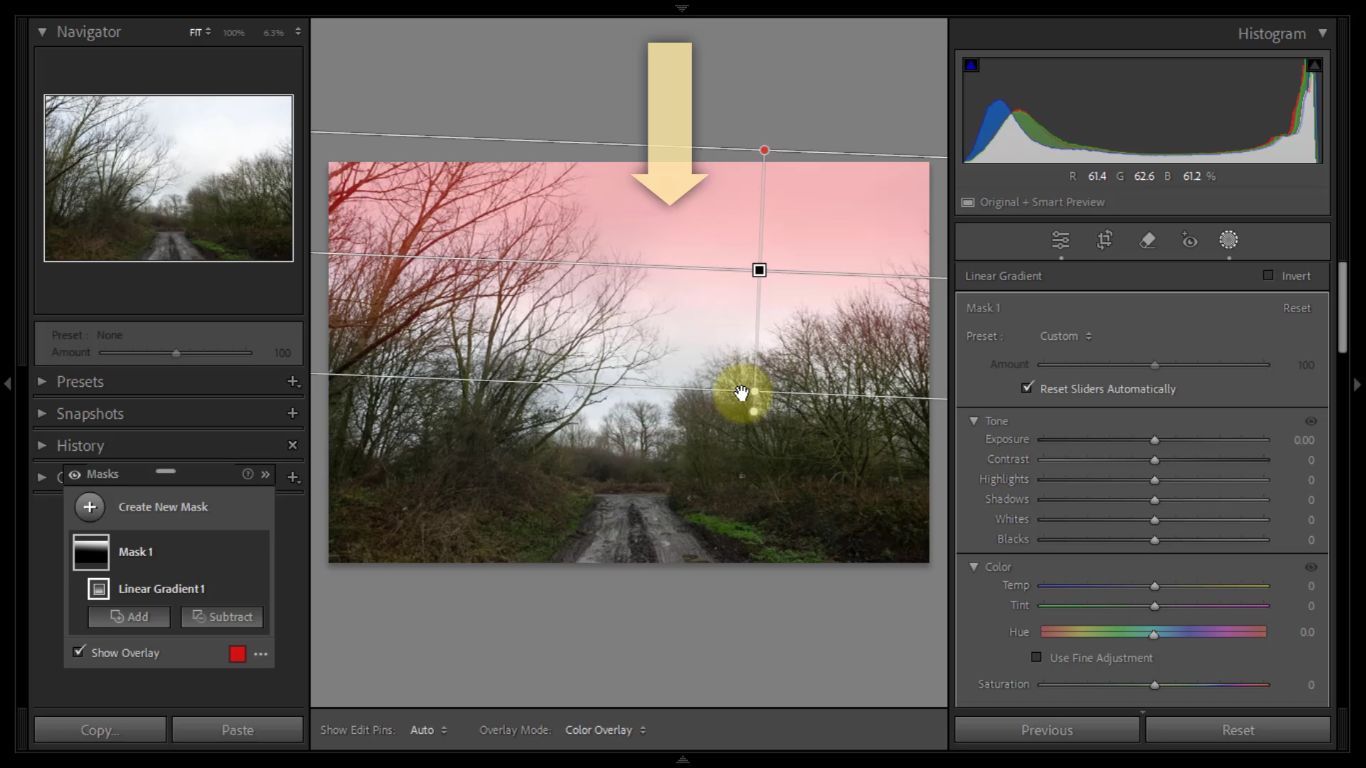
- I then click and drag the gradient downwards from the top of the image, stretching it into place.
From there, I fine-tune the position using the middle handle and adjust the feathering area using the lower boundary. The feathering controls how softly the gradient blends into the image – critical for a natural-looking transition.
Step 3: Adjust the Exposure
- With the gradient selected, I reduce the Exposure slider to darken the sky.
- I avoid overdoing it—this is about subtle control, not too dramatic at this point.
- This darkens the sky at the top of the image and allows it to fade gradually toward the center, which is the focal point of the composition.

The effect is immediate:
✔️ More detail in the sky
✔️ A better balanced exposure
✔️ Stronger visual draw toward the center of the frame
The Problem with the Tree Branches
But here’s the catch:
That linear gradient doesn’t just darken the sky – it also affects everything else in the top section of the image, including the fine tree branches on the left.
- The branches now appear too dark.
- They contrast awkwardly with the mid-toned branches elsewhere in the image.
- It creates a visual distraction that I don’t like and need to fix.

To solve that, I’ll need to remove the exposure adjustment from the branches without touching the sky. That requires a more targeted approach using a Luminance Range Mask – which I’ll cover next.
Solving the Branch Problem Using a Luminance Range Mask
How to Keep Natural Detail in the Branches While Darkening the Sky
After applying the linear gradient to darken the sky, I noticed an issue:
The mask also darkened the delicate tree branches in the top-left corner that I didn’t like
To fix this, I used a Luminance Range Mask to refine the selection so it only affects the bright areas of the sky – not the darker tree branches.
Step 1: Intersect the Gradient with a Luminance Range
Here’s how to combine the two:
- In the masking panel, I hovered over the linear gradient and clicked the three dots on the right side.
- From the dropdown menu, I chose “Intersect Mask With” and then “Luminance Range.”
- This stacked a luminance range on top of the existing gradient, allowing the adjustment to be filtered by brightness.


This intersection means that the exposure change from the gradient now only applies to areas within the brightness values I select next.
Step 2: Set the Luminance Range
- A new dialog box appeared with a luminance range slider, spanning from pure black to pure white.
- By default, all brightness values are selected, so I needed to fine-tune that.

What I wanted was to exclude the darkest parts of the image – those tree branches – from the selection:
- I dragged the left handle on the luminance range slider to the right, trimming out the darkest tones.
- As I adjusted, the branches in the image immediately began to lighten, separating them from the darkening effect on the sky.

Step 3: Feather the Selection for a Natural Transition

Initially, the separation was too harsh – there was no gentle transition between the selected sky and unselected branches. That meant the introduction of those harsh artifacts. To fix that:
- I adjusted the feathering by dragging the leftmost edge of the luminance range curve back slightly toward the dark end.
- This softened the transition between selected and unselected areas, blending the effect naturally.

The more I feathered, the smoother the blend. The less I feathered, the more jarring it looked. I stopped when the result felt right – natural and seamless.
Step 4: Fine-Tune to Taste
Once the branches were properly excluded and the feathering was balanced:
- I refined the main luminance range slider to control how much of the dark-to-midtones were still affected.
- Moving the slider right lightened the branches.
- Moving it left reintroduced darker pixels and slightly re-darkened the branches.
This is all down to personal opinion, and what you feel is best. The best result comes from a balance between:
- The exposure change from the gradient
- The luminance range limit
- The feathering setting
Once dialed in, the sky remains dark and dramatic, while the tree branches remain unaffected, and completely free of masking artifacts.
Before and After
Toggling the luminance range mask on and off showed the difference:
- Before: The branches were unnaturally darkened, creating visual clutter.
- After: The transition was smooth, and the image looked intentional, balanced, and polished.
Conclusion
Every photograph is different, but if you continue to see artifacts after making fine adjustments to correct them – and you can’t work out how to fix it – it’s often because the exposure or contrast changes are too strong for the image you’re working on. That’s where compromise comes in. You’ll need to dial back the effect until the artifacts disappear.
If you’ve run into similar problems with artifacts in Lightroom—whether halos, hard edges, blotchiness, or anything else – drop a comment below. Let me know what you’re struggling with, what you’d like explained further, or even if you’ve found your own solution. If enough people are interested, I’ll cover it in a future video.
Here is a section of the YouTube video that goes along with this article. this section covers what’s in the article and no more
Enjoying the video?
Check out more on my YouTube channel — I post regularly about photography, composition tips, post processing, and general photography goodness.